
If you are looking for ways to uninstall Webroot Antivirus Software as you are attracted towards another Best antivirus software of 2020, then you are at the right place. However, Webroot is also considered in the list of top 10 antivirus software of all times. But if the user wants to upgrade or try their hands on different antivirus software, then there is nothing wrong in it. To install the other software successfully and comprehensively, user is required to delete the traces of the existing prodigious software which is Webroot in this case. Also, the existence of two antivirus software at the same time in a system can lead to technical problems and create unnecessary fuss between them. And what worst happens next is, both of them fails at guarding the system against catastrophic virus threats. Therefore, first of all, uninstall the software through the Windows Control Panel. Annihilating the Webroot Antivirus Software from the computer may require some best tips that are easy to understand and follow. Hence, to help you out, we are here with this blog to guide you on How to Uninstall Webroot Antivirus Software through quick and straightforward steps.
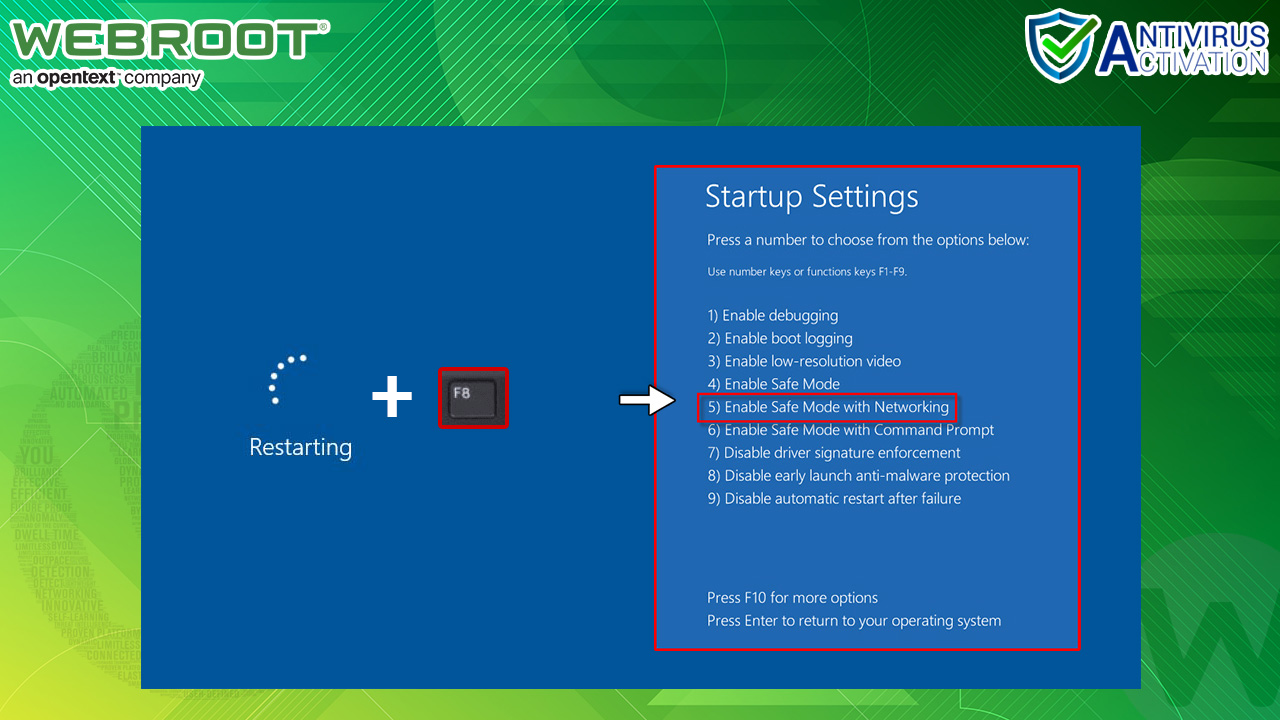
Easy-Peasy Tip and Trick: If you are facing any problem running the Webroot Upgrade tool, then you are required to start your computer in Windows Safe Mode. For doing this restart the system and press the F8 key just before the Windows logo appears. Afterwards, use the arrow key to select the option Windows Safe Mode with Networking and next press the Enter Option.
Step-By-Step Guide to Manually Uninstall/Remove Webroot Antivirus Software
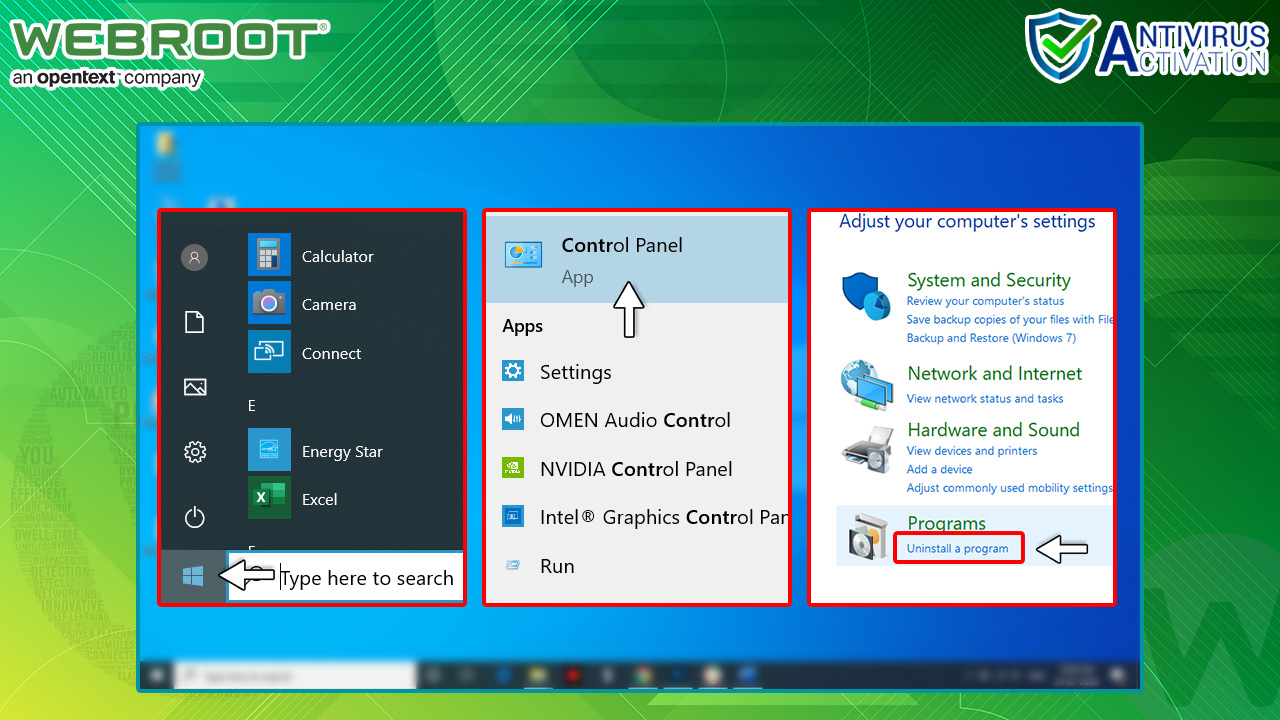
Step 1: Firstly, click on the Start button on your desktop and select the Control Panel. Afterwards, click on uninstall aprogram option.
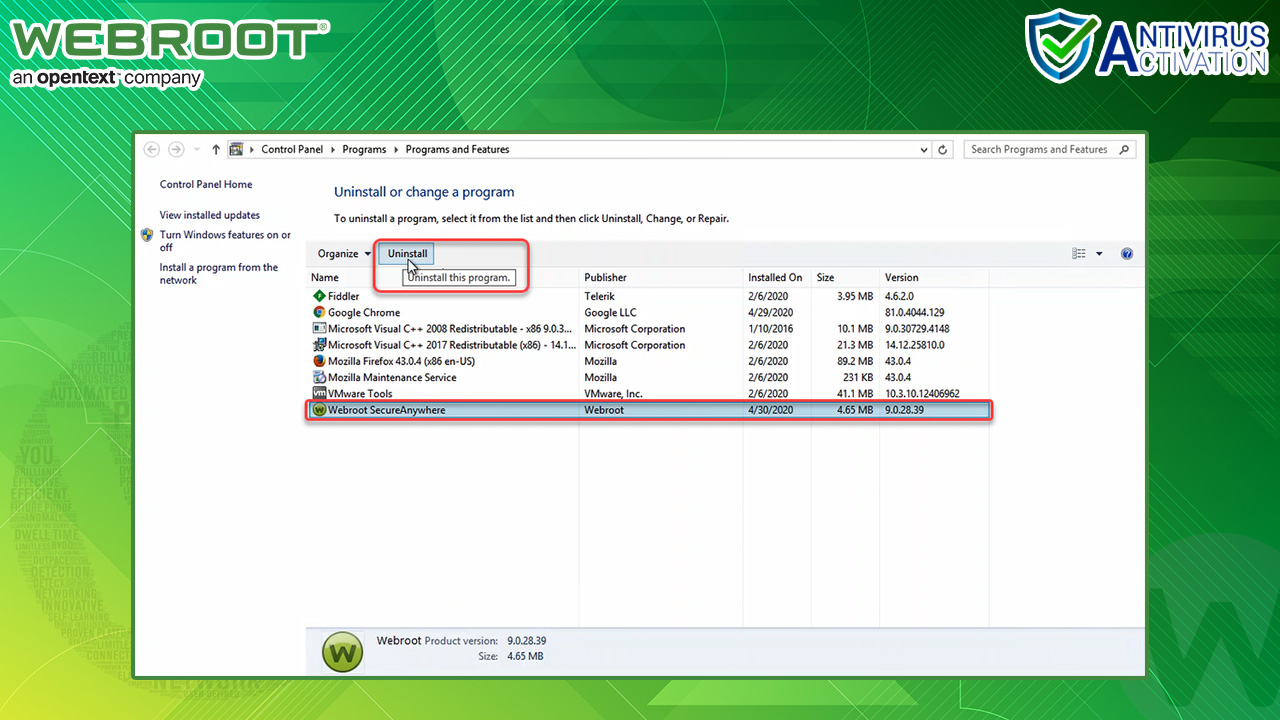
Step 2: Now, click on the name of your Webroot product, and after that, click on Uninstall.
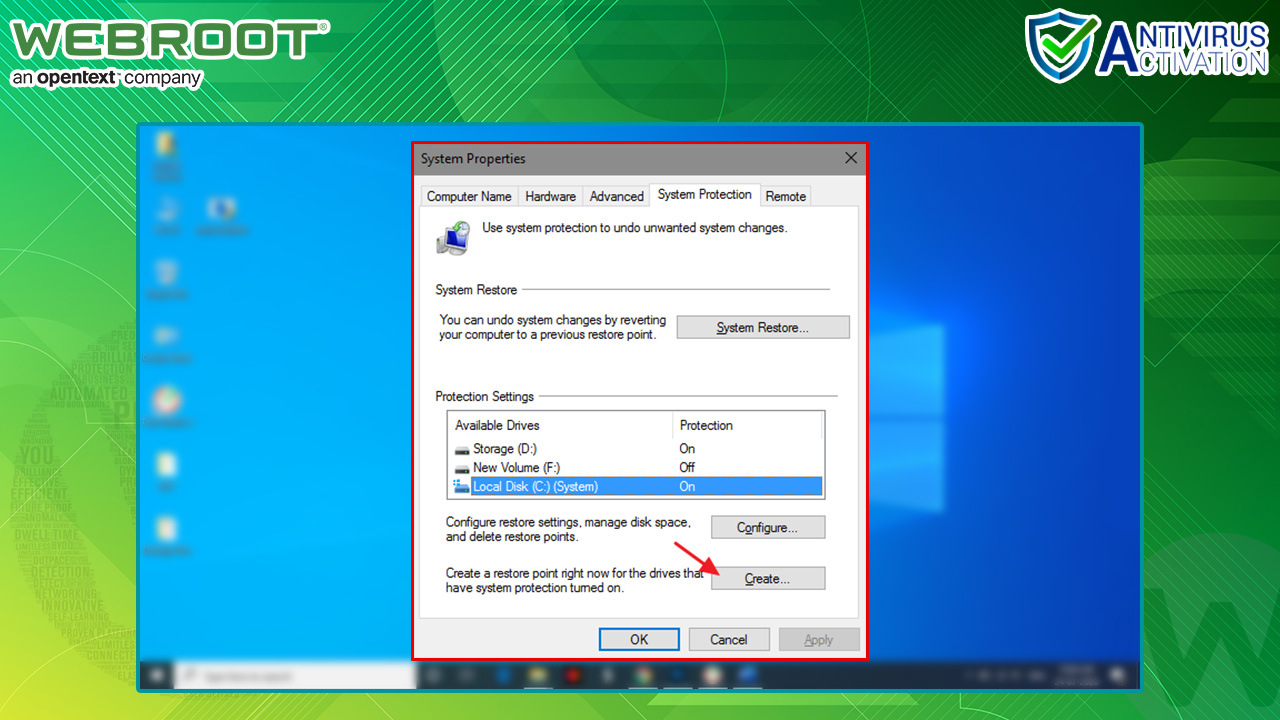
Step 3: After that, click on Start and now right-click on Computer option. Now, click on Properties and then System Protection option. Subsequently,click onCreate in order to set a system restore point.
Step 4: Now, open your Web Browser then download the CleanWDF tool that too from the Webroot website. Subsequently, save the tool to your desktop.

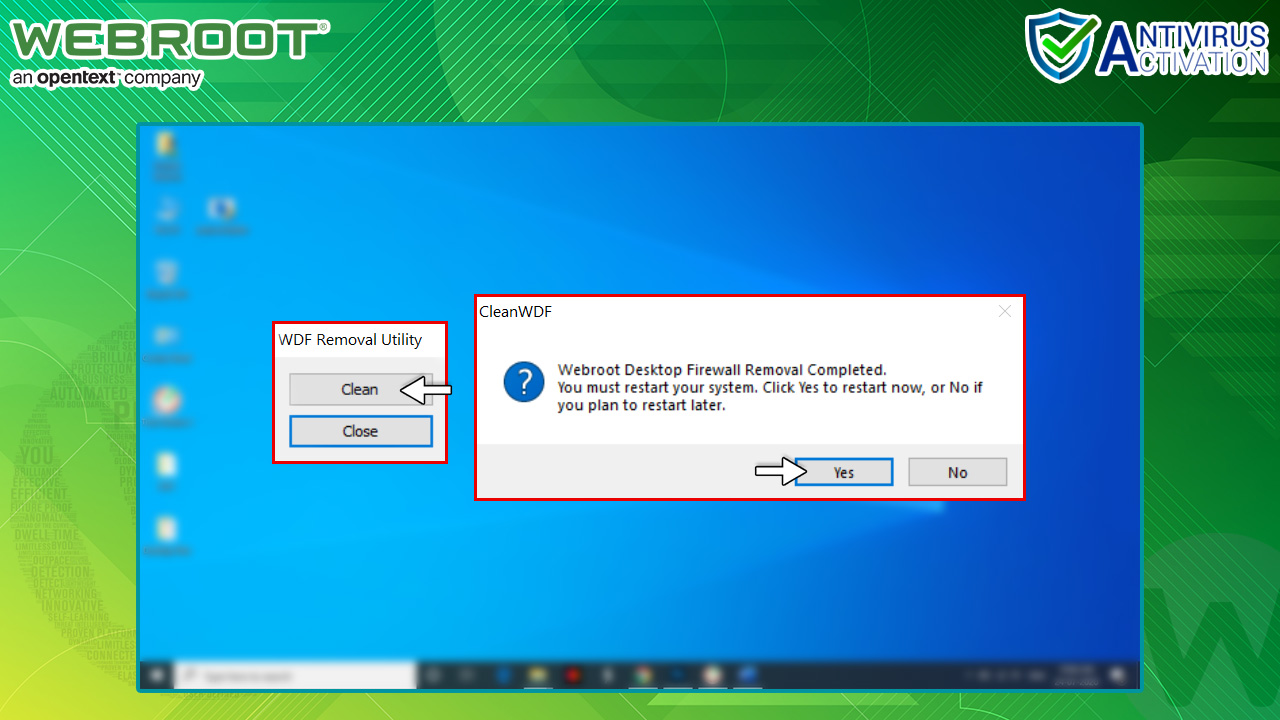
Step 5: After that, double-click on the CleanWDF.exe file on the desktop. Then click on the clean option to remove all Webroot drivers. Once the cleaning is complete, then click on Yes option to restart the computer. If you don’t receive an option to restart, click on OK.
Step 6: Now, download the WRUpgrade Tool file from the Webroot website. After that, save the tool to your desktop.
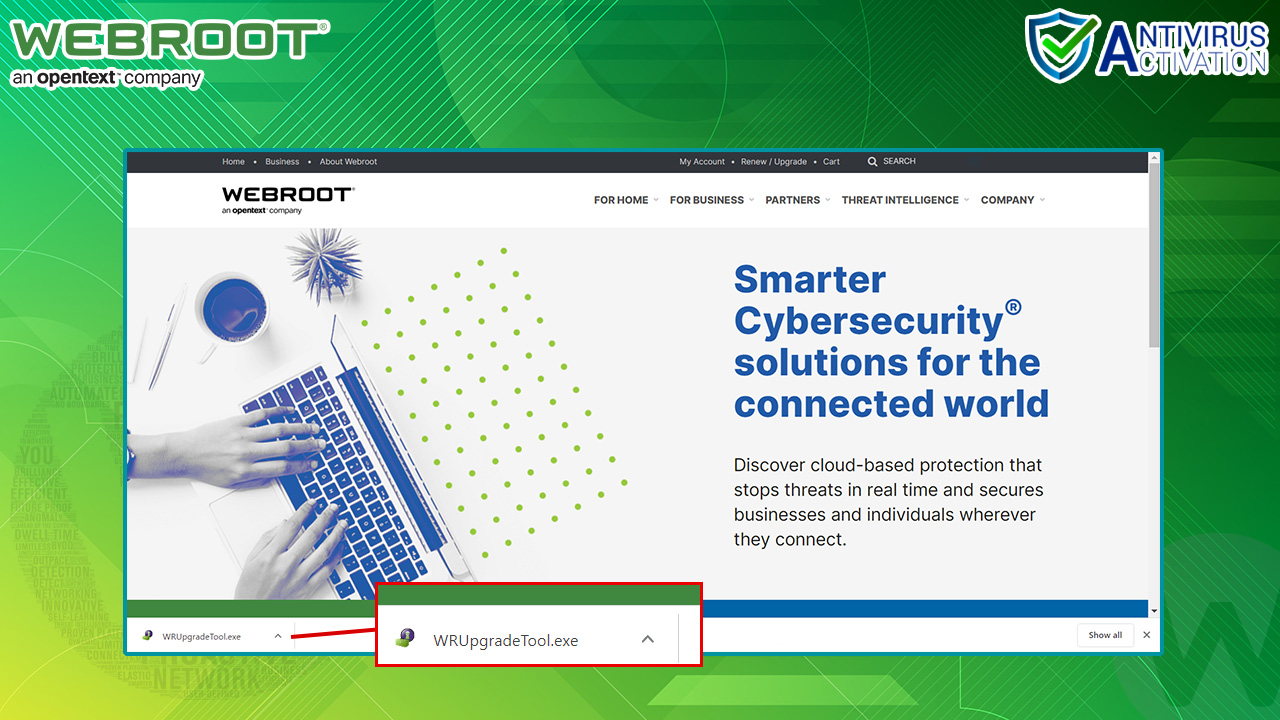
Step 7: Afterwards double-click on the WRUpgrade Tool file from your desktop.
Now, click on Next to uninstall any left behind Webroot files on your computer.
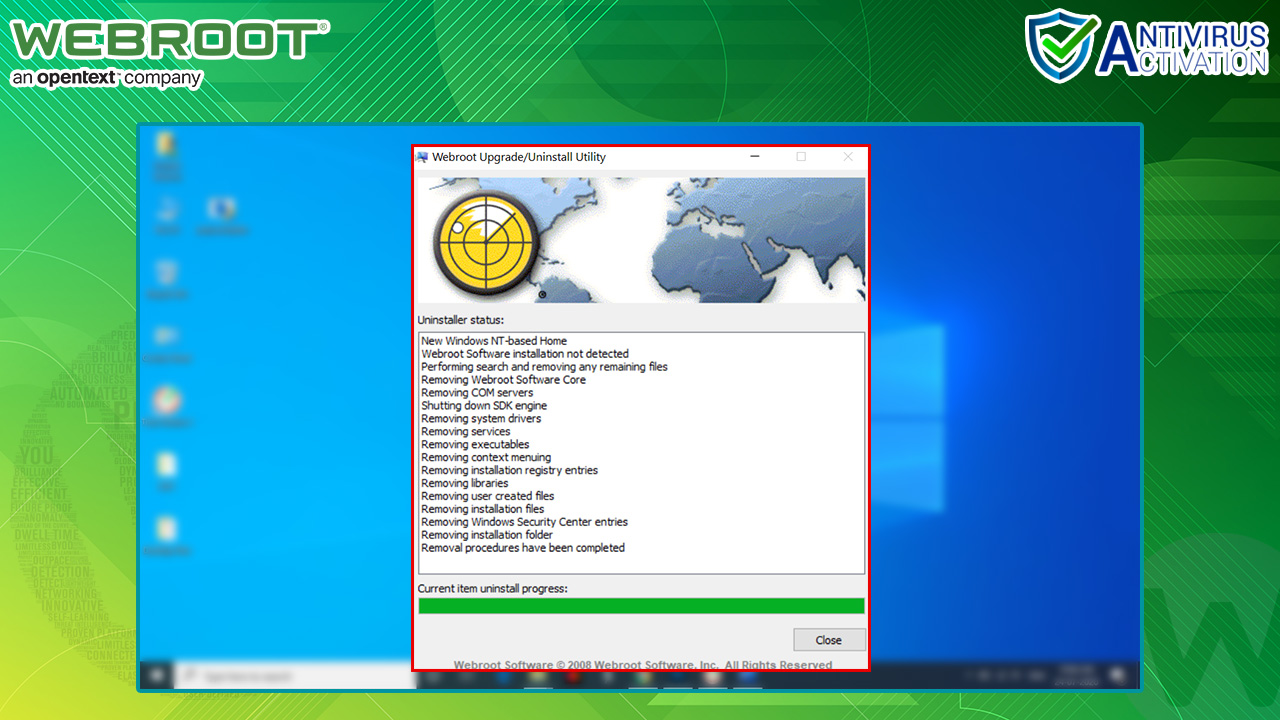
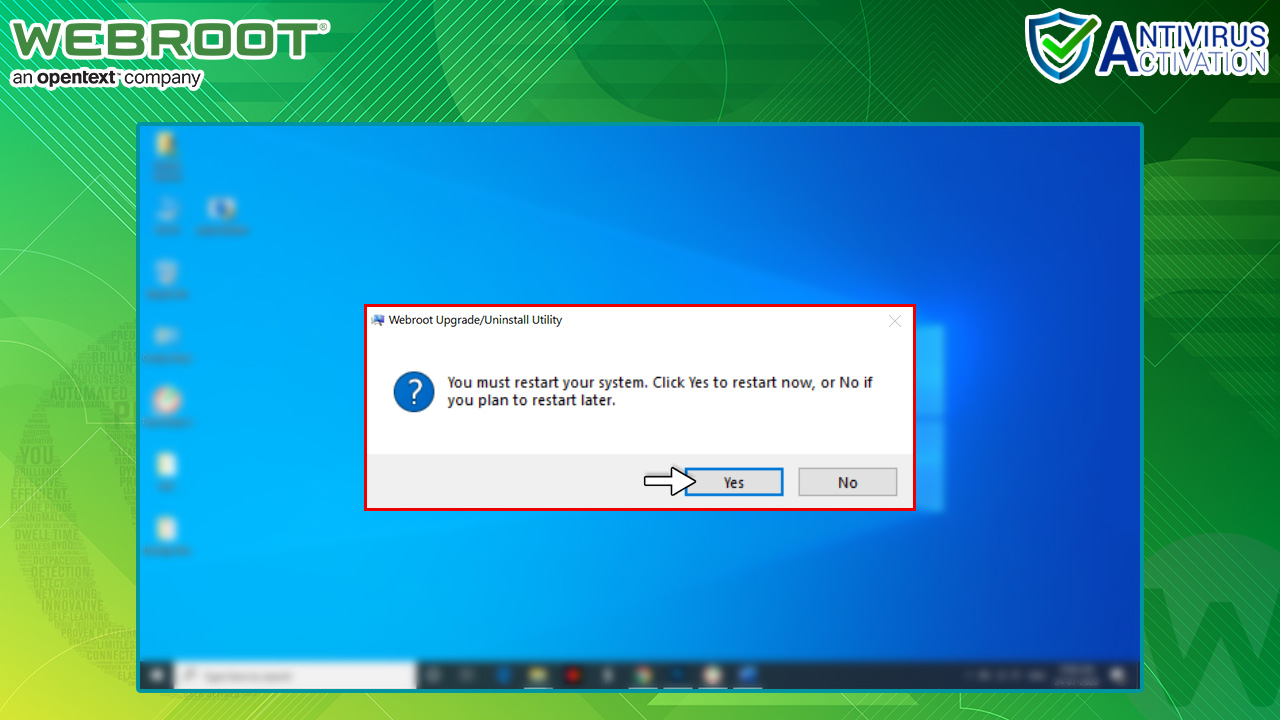
Step 8: Then click on Ok option to restart the system as soon as the tool finishes the cleanup process.
Another Method
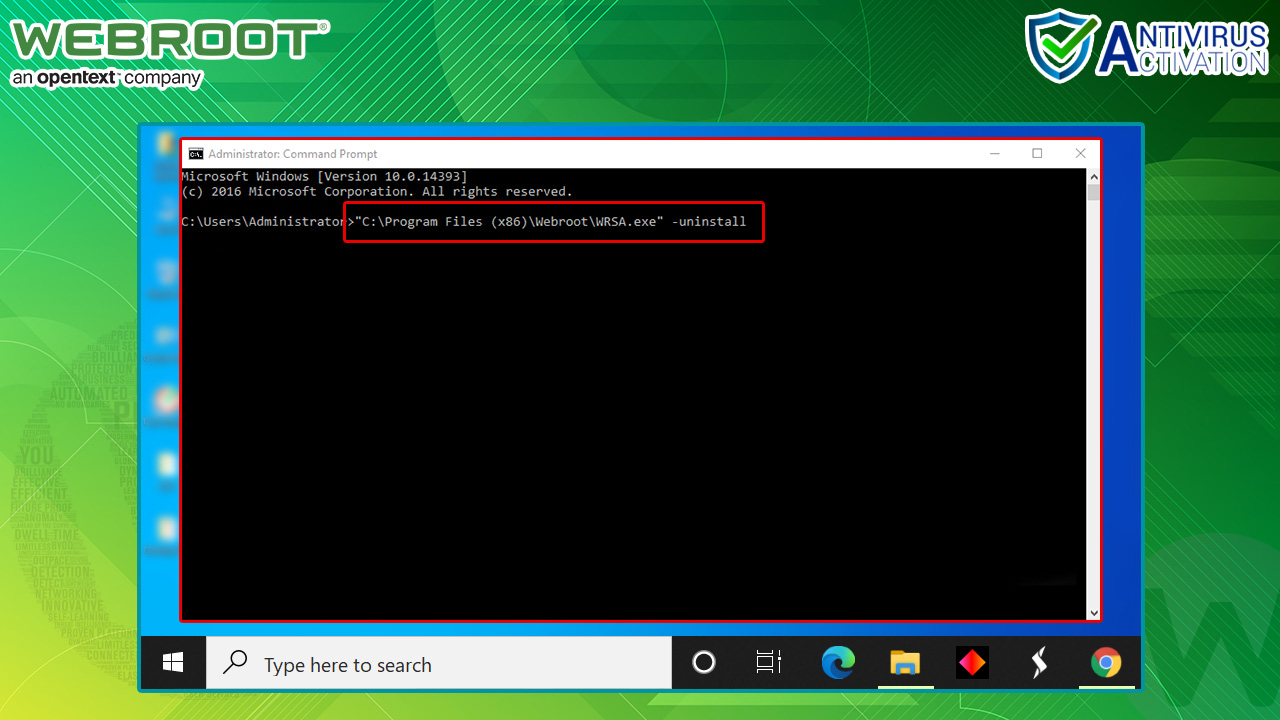
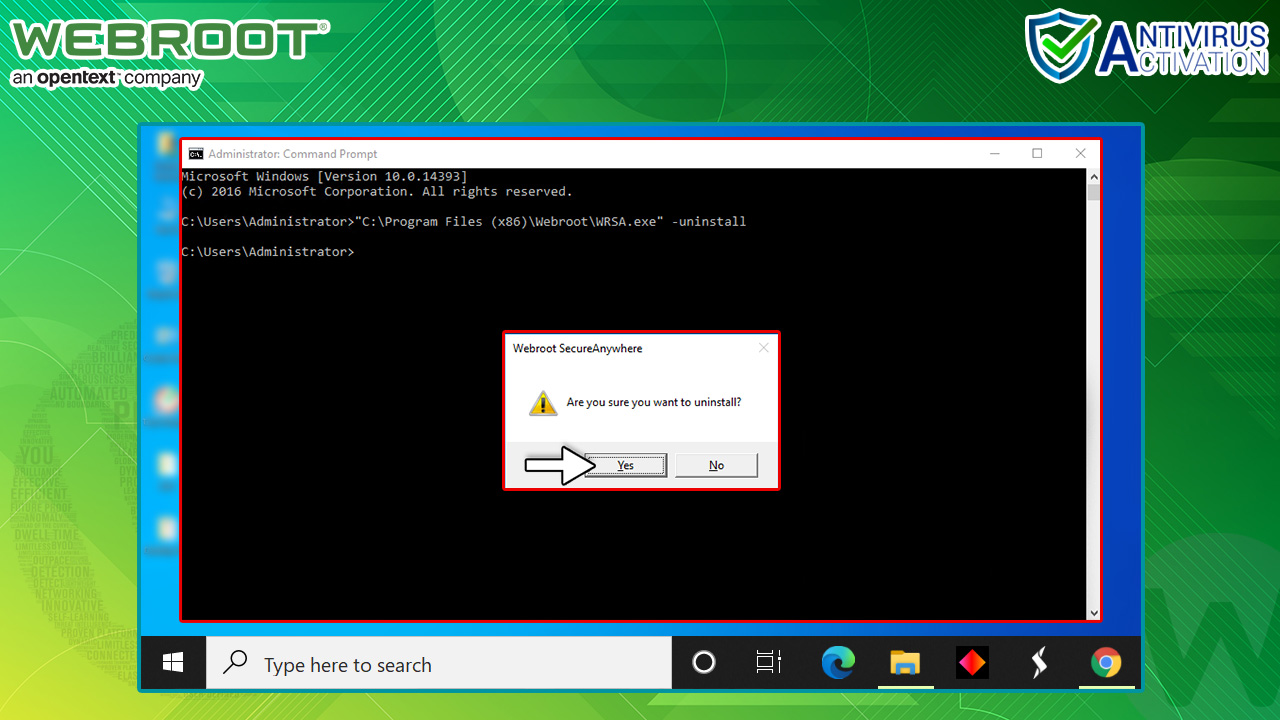
Step 1: Firstly, click on the Search icon at the bottom screen in the Taskbar.
Step 2: Now, type the mentioned line in the Start Search bar and that too in an exact manner as follows: “C:\Program Files\Webroot\WRSA.exe” –uninstall.
Step 3: Afterwards press the Enter key on the Keyword.
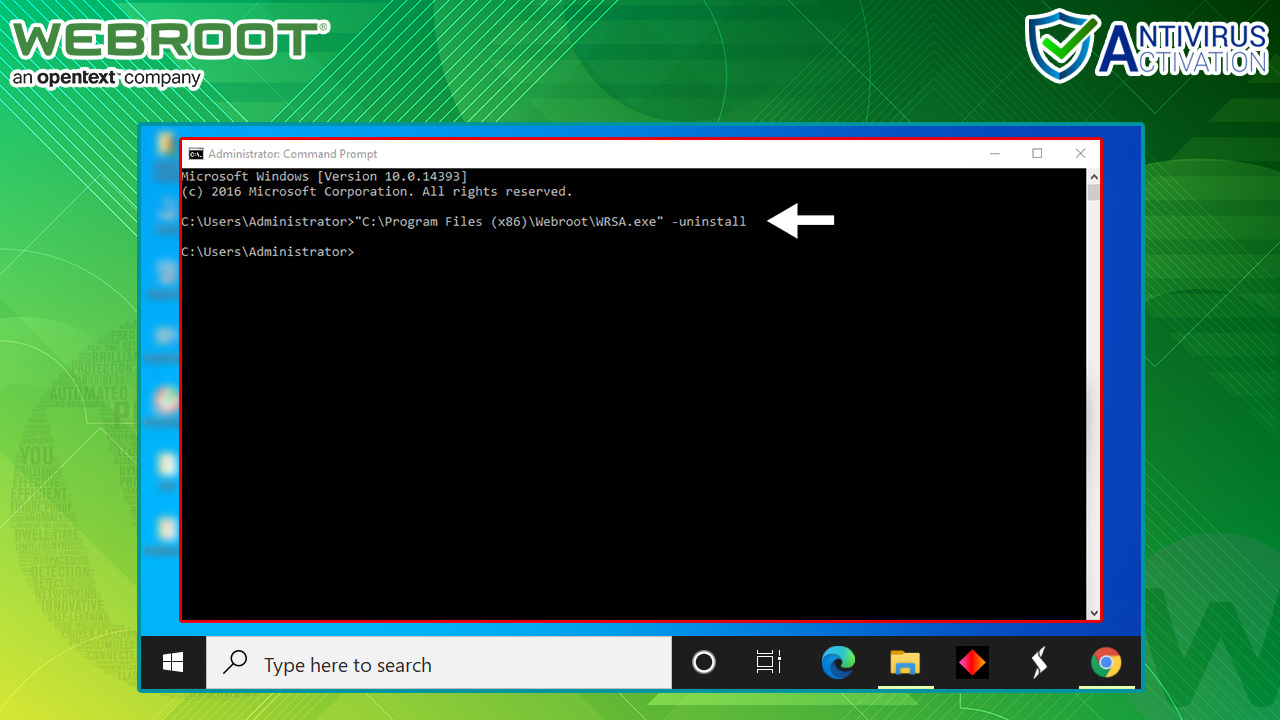
Step 4: When prompted ‘Are you sure you want to uninstall? Then click on Yes option.
Choose the method wisely; whichever you find is the easiest to follow. Suppose you face an error stating that ‘SecureAnywhere is currently managed by the Web Console and all changes need to be applied centrally, then in that scenario, we would suggest referring to the Webroot documentation for further details. Also, if you are unsuccessful at following the methods as mentioned earlier, then contact Webroot Antivirus Help Line Number.
